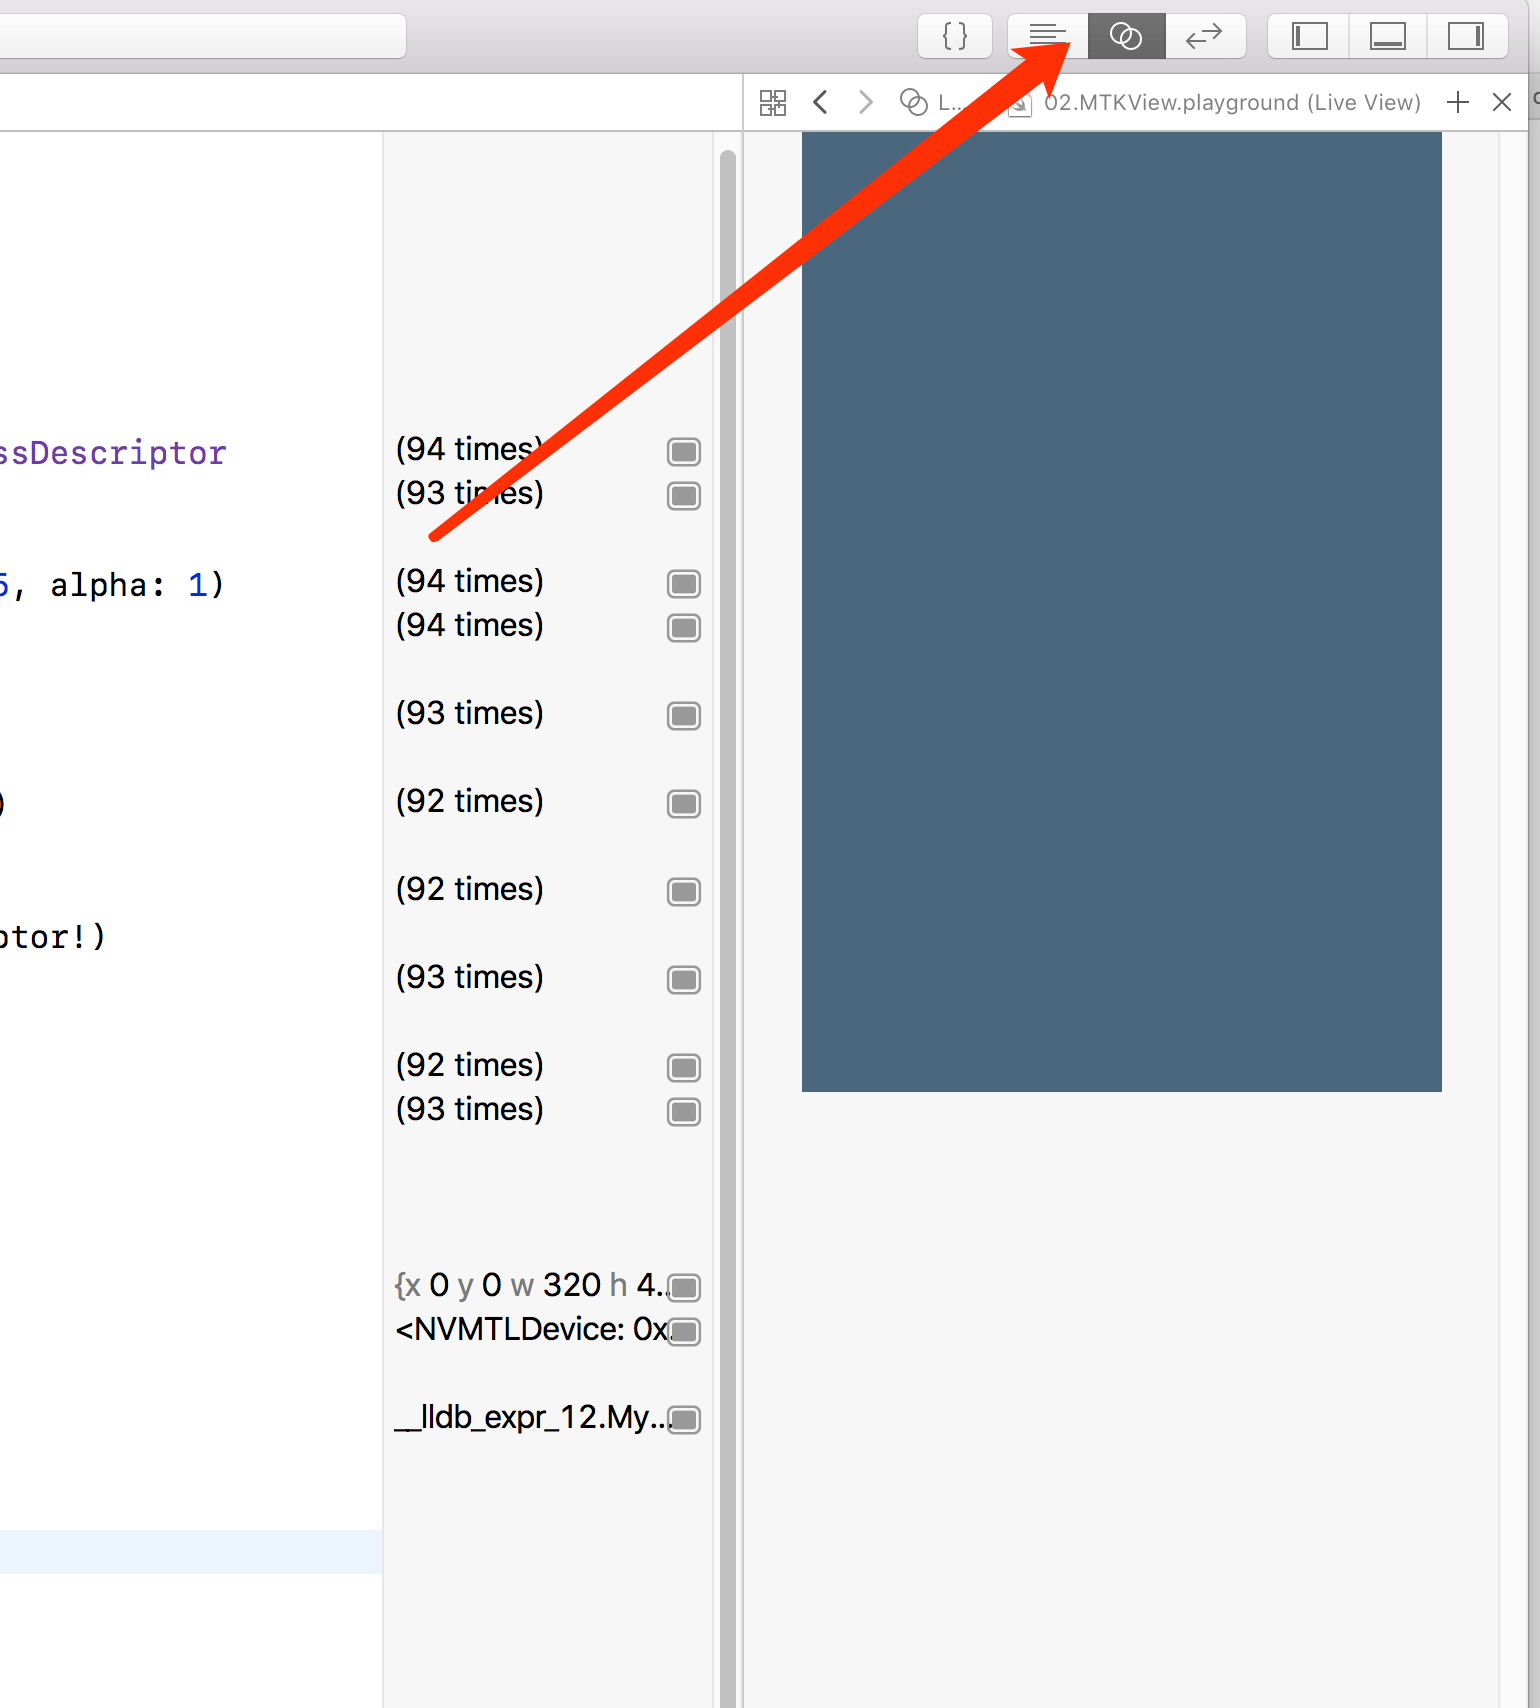
当我们获取了Metal的设备之后, 就可以开始做Metal的渲染了. 我们可以使用Core Animation提供的CAMetalLayer, 或者MetalKit提供的MTKView来显示渲染的结果.
MetalKit提供的MTKView更为方便快捷.
我们新建一个Xcode Playground, 02.MTKView.playground.
我们首先需要引入需要引用的库:
1
2
|
import MetalKit
import PlaygroundSupport
|
我们再从MTKView派生一个MyMetalView, 并重写draw方法.
 1
 2
 3
 4
 5
 6
 7
 8
 9
10
11
12
13
14
15
16
17
18
19
20
21
|
class MyMetalView: MTKView {
    override func draw(_ dirtyRect: NSRect) {
        super.draw(dirtyRect)

        let renderPassDescriptor: MTLRenderPassDescriptor? = self.currentRenderPassDescriptor
        let drawable: CAMetalDrawable? = self.currentDrawable

        let bgColor: MTLClearColor = MTLClearColor(red: 0.3, green: 0.4, blue: 0.5, alpha: 1)
        renderPassDescriptor?.colorAttachments[0].clearColor = bgColor

        let command_queue: MTLCommandQueue? = self.device?.makeCommandQueue()

        let command_buffer: MTLCommandBuffer? = command_queue?.makeCommandBuffer()

        let command_encoder: MTLCommandEncoder? = command_buffer?.makeRenderCommandEncoder(descriptor: renderPassDescriptor!)
        command_encoder?.endEncoding()

        command_buffer?.present(drawable!)
        command_buffer?.commit()
    }
}
|
可以从上面的代码看到, 我们使用了MTLRenderPassDescriptor, CAMetalDrawable, MTLCommandQueue, MTLCommandBuffer, MTLCommandEncoder等类,
做了一次最基本的渲染.
接着我们调用MyMetalView, 并显示到Playground的Live View中.
1
2
3
4
5
6
|
let rect = CGRect(x: 0, y: 0, width: 320, height: 480)
let device = MTLCreateSystemDefaultDevice()!

let view = MyMetalView(frame: rect, device: device)

PlaygroundPage.current.liveView = view
|
打开Live View, 就可以看到我们本地的渲染结果.

同样源码托管在github: https://github.com/young40/LearnMetal . 欢迎star, 感谢!
